In the previous post, I mentioned some of the factors involved in choosing a consolidant for the job at hand. With this particular treatment I needed an adhesive that would obviously re-adhere flaking media, but I also needed one that would not dry with gloss on the relatively matte water-based paint Odets used, nor would I want one that would saturate the paint, causing it to appear darker where applied. Literature suggested both gelatin and isinglass would meet my requirements; I made some mock-ups to test the results and favored the isinglass.
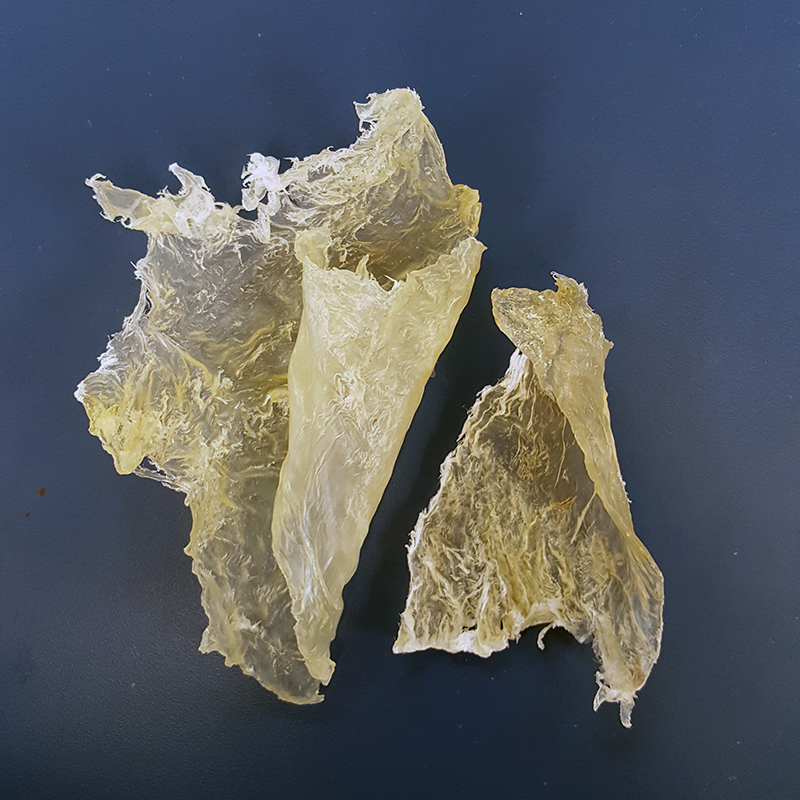
So what is isinglass? It is obtained from the dried swim bladders of fish- in this case sturgeon- and is largely made up of collagen.
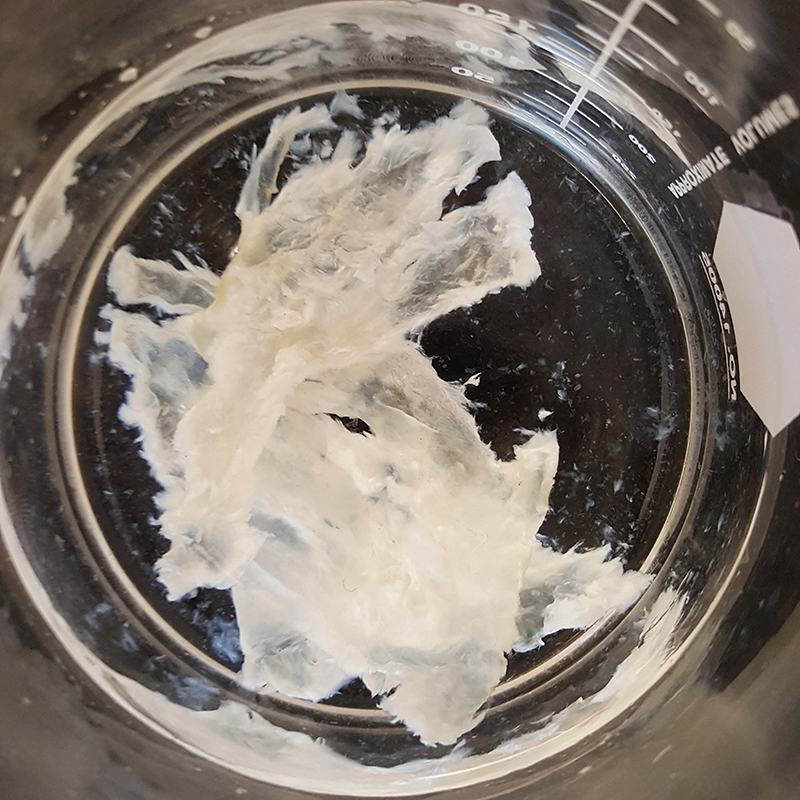
To prepare, one weighs out the amount needed and soaks it in water for 24 hours. The swollen mass is them mashed until pulpy and more water added to bring the solution to the percentage needed. It is finally heated to 55c for a short time. For an isinglass solution to be effectively vaporized in the ultrasonic mister, the concentration has to be quite low- in the 1%w/v range. This necessitates two or three applications for the consolidation to be successful.
Here are photos of the complete set up in operation-
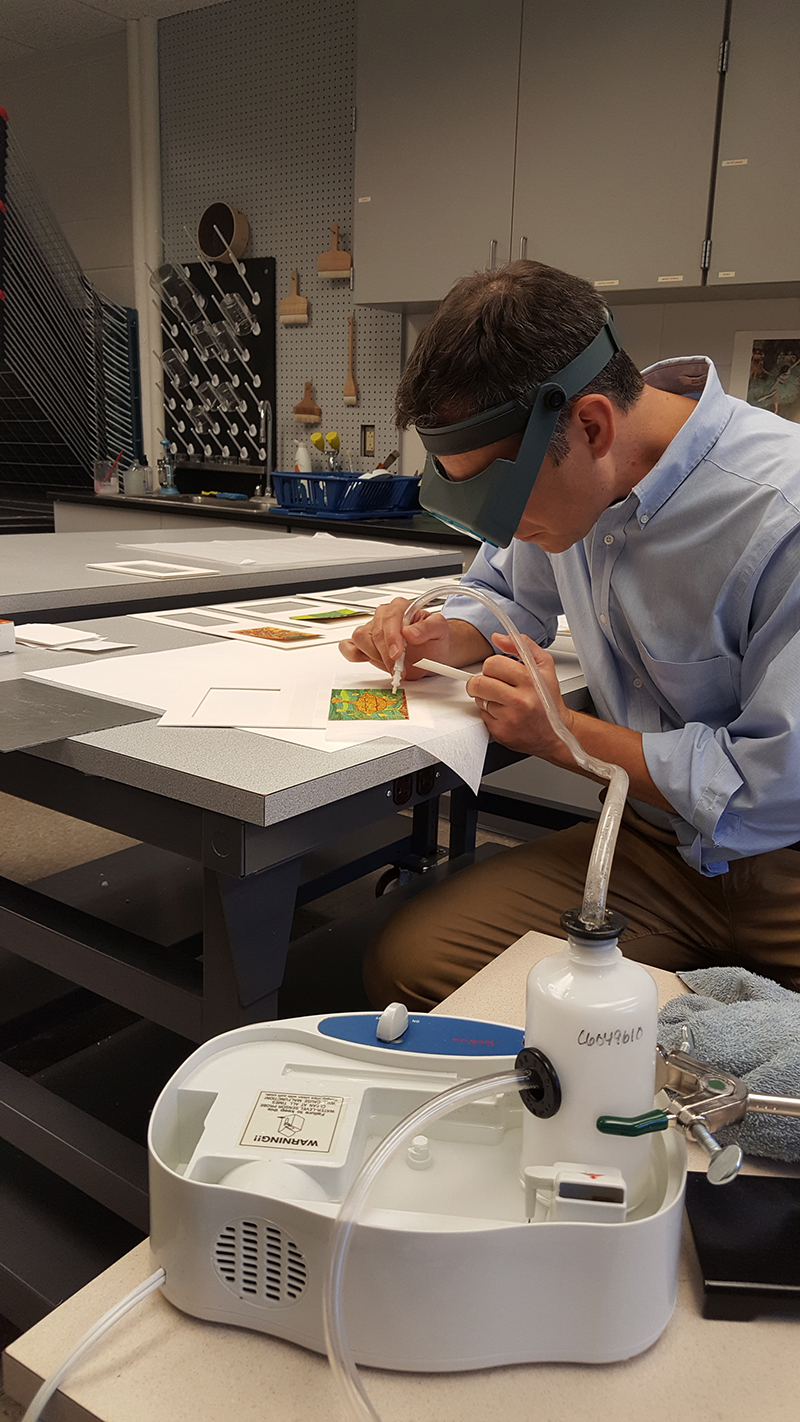
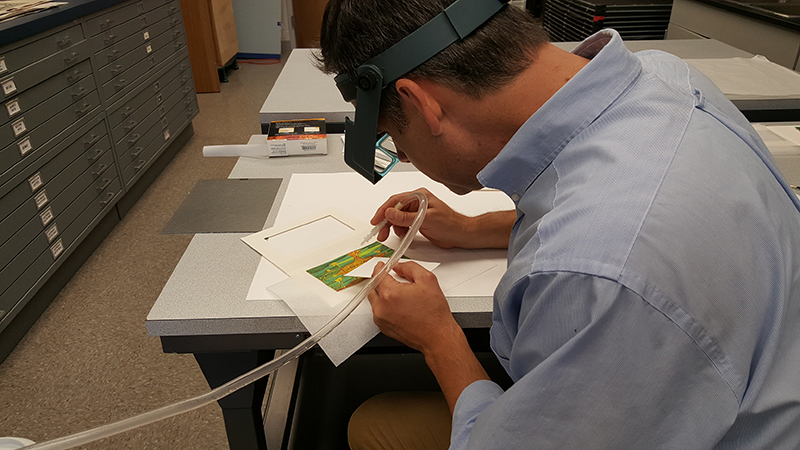
Overall, the design developed back in the 1990’s functioned quite well. The parts were easy to procure through our campus chemistry storeroom (ringstand, three-prong clamp, LDPE bottle, tubing), Lowe’s (barbed connector to attach tubing to air compressor on suction table), and McMaster-Carr (fittings for the nozzle, and black rubber grommets to connect tubing to bottle*). This image shows a close-up of the nozzle held in my right hand. It features two reducing barbed fittings connected with 1/4″ tubing resulting in a 1/8″ stream of vapor.
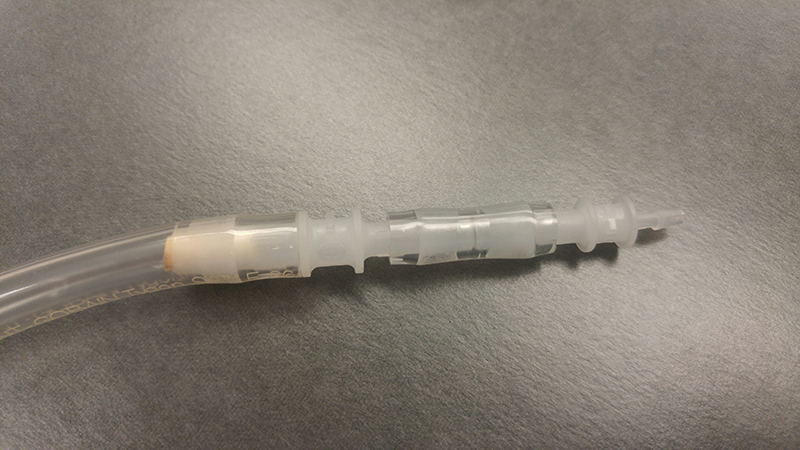
From time to time, beads of condensed consolidant will form at the tip of the nozzle. In the above photo you can see a tube of blotter inserted into left side of the piece. Additionally, in my left hand I held a piece of blotting paper to absorb and drips that formed before they had a chance to fall onto the painting beneath. The biggest problem was with the airflow coming from the suction table compressor. The design has a 3-way T-connector placed along the supply tube before it enters the bottle. Its purpose is to bleed some of the air pressure off the hose so that it isn’t so great when leaving the nozzle as to blow away media flakes. I found the air pressure was still somewhat strong and required monitoring the angle and proximity to the artwork when in use. A much better, though more expensive, solution would be to attach some type of flow regulator to the air compressor valve on the suction table. Other than that, one other word of caution- it is important to flush the system after each use with water and air or the consolidant will build up in the tubing and nozzle. In the case of gelatin or isinglass (being organic) it could result in mold developing over time.
*other makers of this system have connected the tubes to the bottle with the use of hot-melt adhesives and epoxy. I found that the use of a grommet, with an inner diameter of the same size as the tubing or slightly smaller, gives a more effective and polished solution.
Leave a Reply